Purchases and notes
- Power supply – Of importance that it is 3.5A. I chose the Argon though I also saw the CanaKit 3.5A Raspberry Pi 4 Power Supply recommended. I liked the Argon on/off switch.
- Raspberry Pi4b
- MMDVM Dual Hat – From research, most of the Chinese ones will be the same modem selection/firmware.
- MicroSD Card – I read as little as 4gb can be used but 16gb is about the same price.
- Case
- Wi-Fi Adapter
Prep SD Card
You can chose to prep the card with either Pi-Star or WPSD, but Pi-Star no longer pushes out updates. The commands, passwords, interface between the two are similar enough that if you need help from Pi-Start tutorials, most easily passes over to WPSD. The major advantage with WPSD is it was really easy to upgrade/flash the modem firmware from dashboard and access SSH.
- Download WPSD – https://w0chp.radio/wpsd/#download-wpsd – specifically: WPSD_RPi-Bookworm.img.xz
- To install image on SD card, download and install Balena Etcher.
- Open Balena, select image, card, and flash.
- When complete, remove card and insert it again so it appears on computer drives.
- Create wi-fi config. This makes it so that the WPSD automatically knows your Wi-Fi network and password and connects. Then to configure your hotspot, all you have to do is access it via browser.
- Use generator to create a config file and save.
- Copy file to SD card
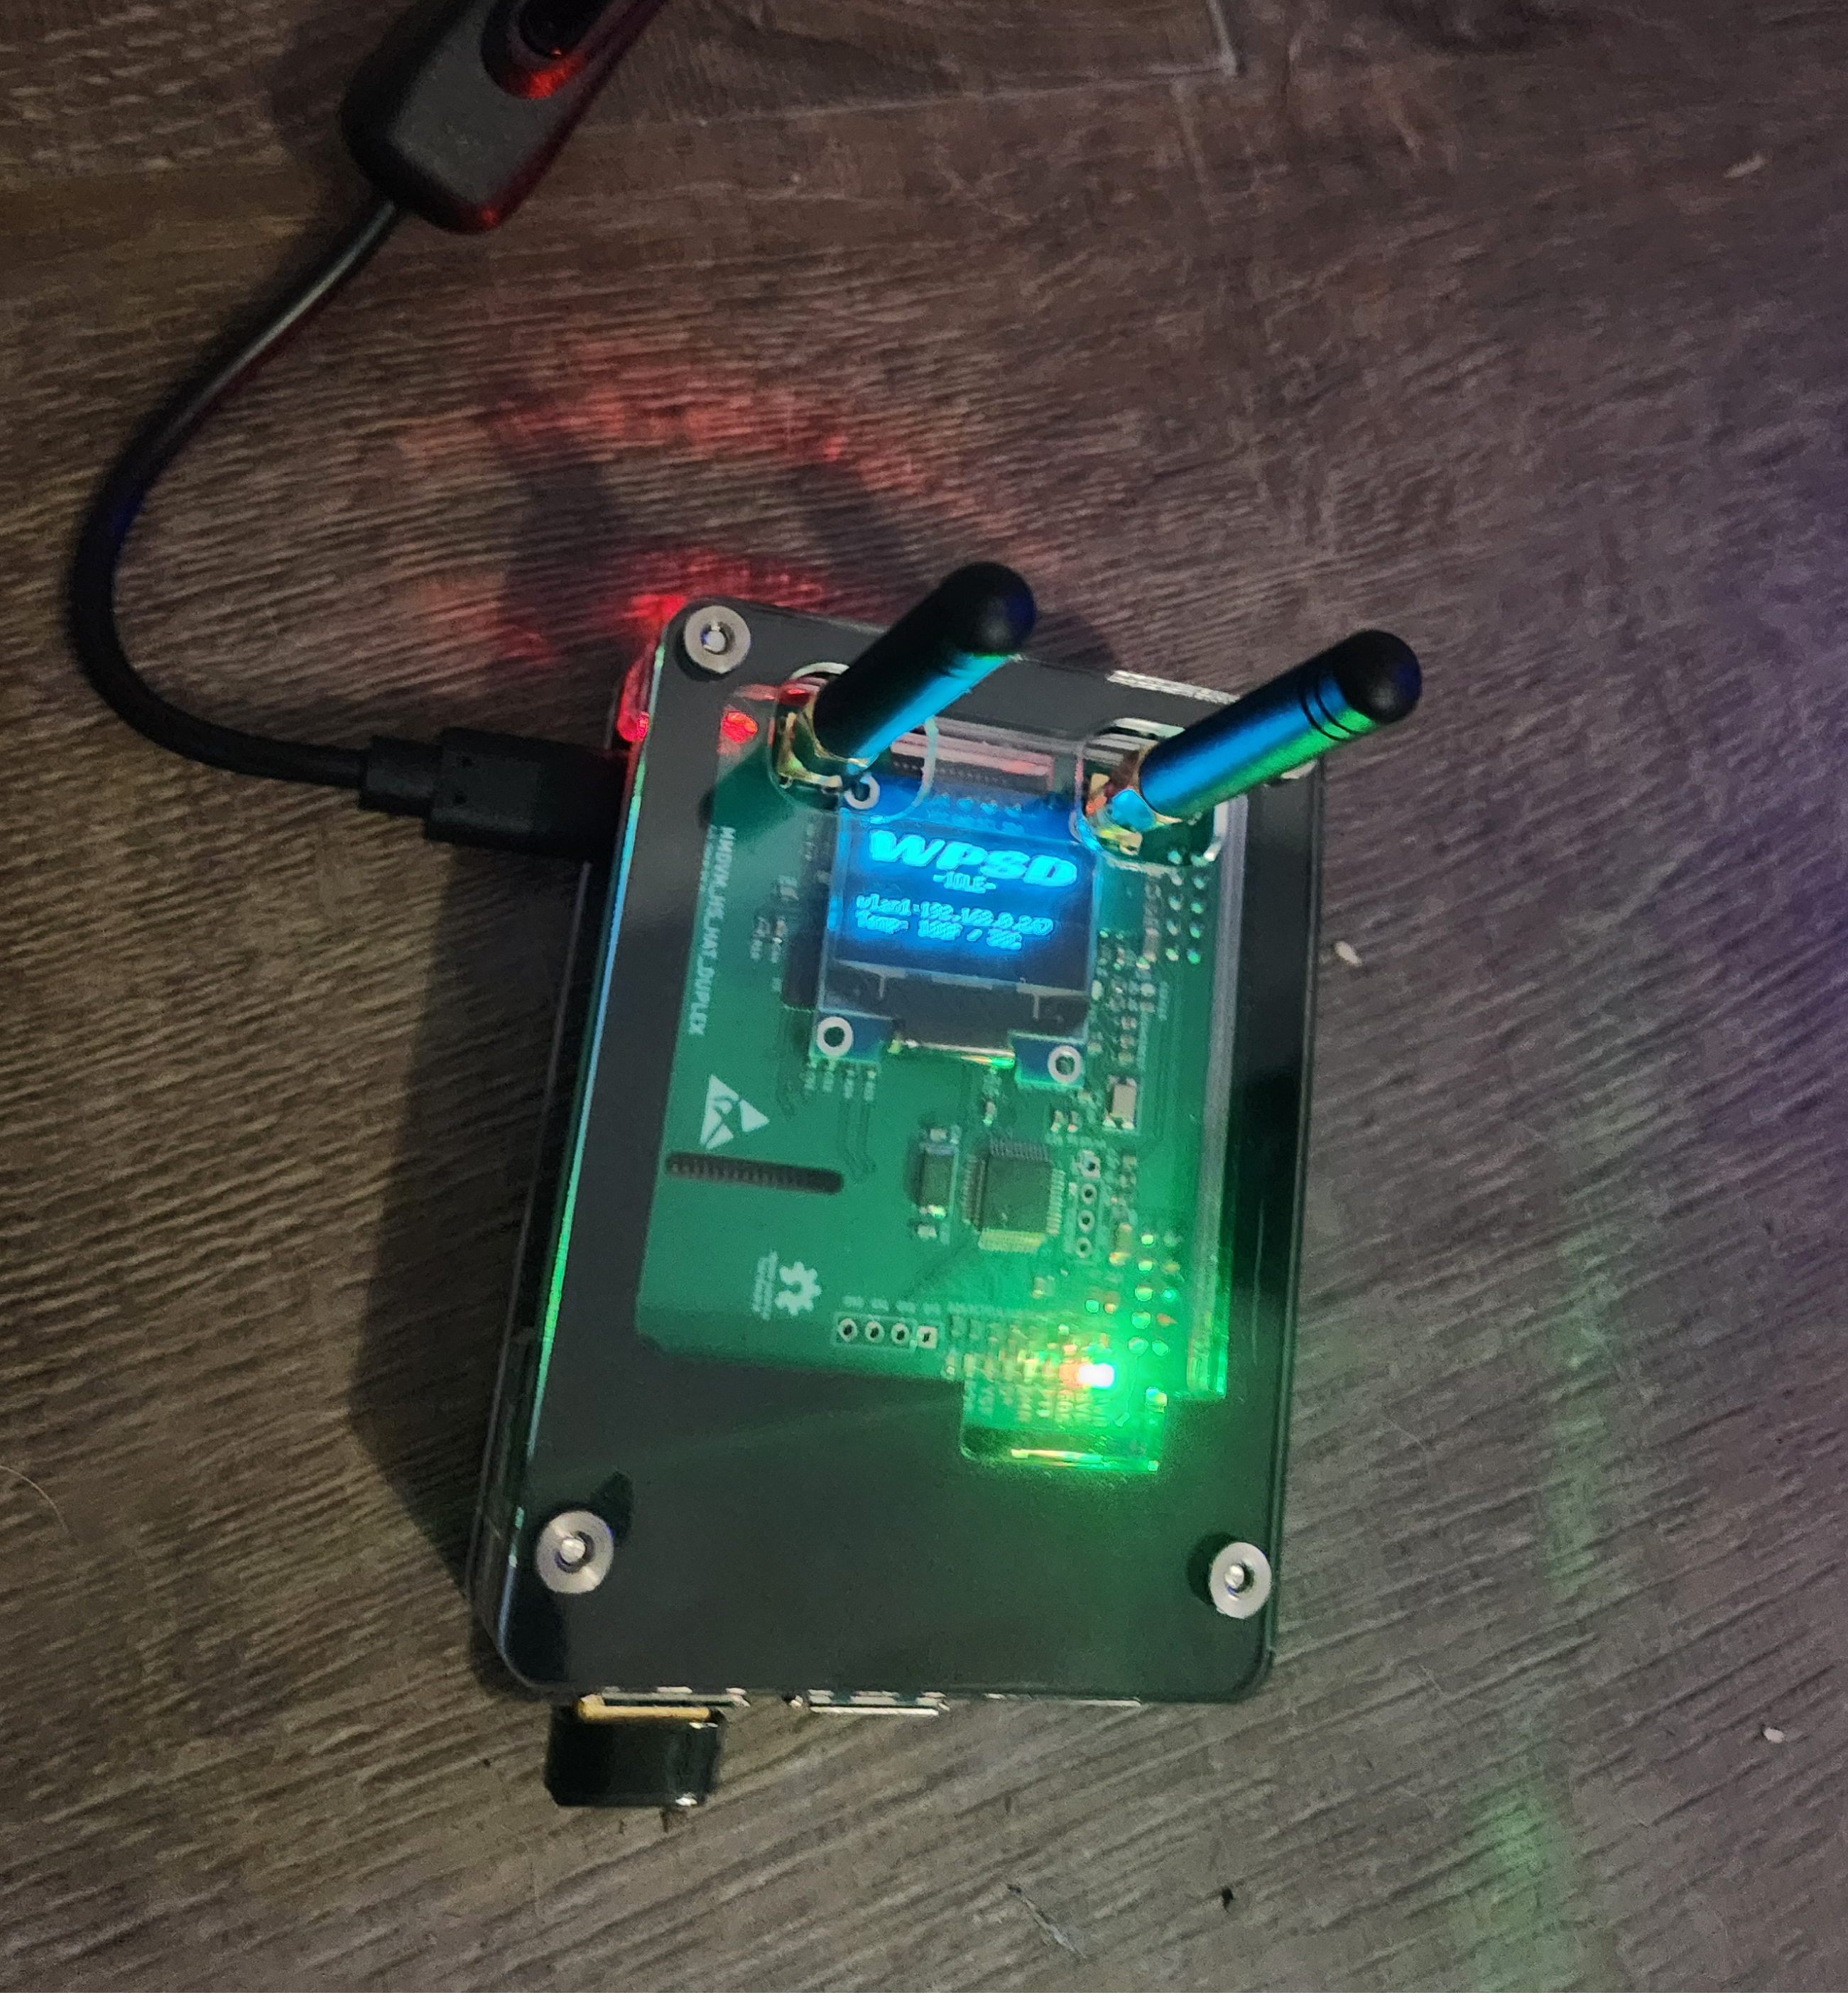
Assemble
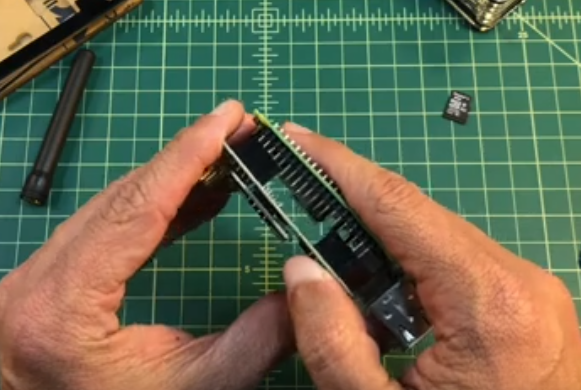
- I did a quick view of Smoking Ape’s video, but it basically amounts to linking up the pins and carefully mounting your MMDVM on top.
- Insert SD card on underside, near edge you should see a slot.
- Add power supply and plug in.
Configure
Allow the hotspot a few minutes to boot and then go to: http://wpsd.local.
| Username | pi-star | Password | raspberry |
Pre-requisites:
- DMR Radio Id. Free, just register: https://www.radioid.net/
- Your callsign
- Brandmeister password. Free, just register: https://brandmeister.network/. Password set under SelfCare / Hotspot Security.
Configurations:
The ones I changed:
| General Configuration | |
| Hostname | wpsd (can be changed) |
| Node Callsign | (your ham callsign) |
| DMR/CCS7 ID | (id received via radioID.net) |
| … | |
| Radio Mode | Simplex (for now) |
| Radio Frequency | If you are using a codeplug, cross check by going to a channel, checking its frequency and using that here. That way it’ll point to your hotspot. |
| Radio/Modem Type | MMDVM_HS_Dual_Hat (DB9MAT, DF2ET & D07EN) for Pi (GPIO). |
| … | |
| Modem Baud Rate | 115200 (This was incorrectly guessed at first by out of box setup to 460800. If this is incorrect, DMR will not light up) |
| System Time Zone | (your info) |
| Dashboard Language | (your info) |
| Node Location & Info Settings | |
| Latitude | (your info) |
| Longitutde | (your info) |
| .. | |
| Town | (your info) |
| Country | (your info) |
| Main Radio Modes | |
| DMR | Switch ON |
| MMDVMHost/Modem Display Configuration | |
| MMDVM Display Type | OLED Type 3 (0.96” screen) Port: /dev/ttyAMA0 |
| Layout Type | G4KLX |
| BrandMeister Network Settings | |
| BrandMeister Master | BM_3103_United_States |
| BM Hotspot Security | (password you created on BM site) |
| … | |
| Edit Hotspot/Repeater | Clicking this should take you to the BM website and show you your device. If your device is not found, you’ll need to do some upgrades on the modem via this same dashboard. |
| General DMR Settings | |
| Color Code | Make sure this matches the channel info as well like frequency above. |
How do you know the upgrade worked?
- The display will appear with WPSD
- On dashboard both DMR and DMR Net are green.
- TXCO Freq and Modem on dashboard have values. On a previous upgrade, the flash was successful but no TXCO Freq would show. It’d just say: “Updating, please wait…”
- In Configuration, click on Edit HotSpot/Repeat under BrandMeister settings. The site should now recognize your device.
Upgrading Your Modem Firmware:
You can double check your MMDVM board for hints at what modem you have if you did not purchase the same as mine. My particular manual/paperwork with this modem was not correct. From what I’ve read the majority of the Chinese models use the same one I use below. If you need to test more, you can simply return to the dashboard and try again. When I tried an incorrect one it simply said flashing.. then FAILED: ERROR and I was able to try again.
- On menu, go to Advanced > (submenu) Tools > Modem Firmware Upgrade
- MMDVM_HS_Dual_Hat (14.7456MHz TCXO) GPIO
- Upgrade Modem
- Allow about 5-10 minutes for it to flash. Once or twice while testing it was very excessive (15?+ minutes and I had to power off and power on and try a different modem).
Assembling the Case
This all went according to plan but two notes:
- Don’t forget to screw in step 1 into the rubber feet
- Remove the MMDVM Hat for placement into the case. The Raspberry Pi board should snuggle in cozy between steps 4-5.
- Your provided with two port cut outs, choose the one that’s appropriate for your Raspberry pi version.
- Steps 8-9 look identical, but I noticed a difference in thickness.
- Step 8, I used the thinnest layer and then mounted the MMDVM. This allowed for little to no gap between the pins.
- I laid down the hat then continued with 9 and 10, from thinnest to thickest, 10 being the thickest.
- There was a bit of a gap but just lightly holding the screws flat on step 12 and screwing the long screws in gently, the parts settled and left no gap.
Leave a Reply
You must be logged in to post a comment.