I think I reached the holy grail – original 7300 remote access WITH cat control from both POTACAT and wfweb! My lazy recliner Sundays will never be the same!
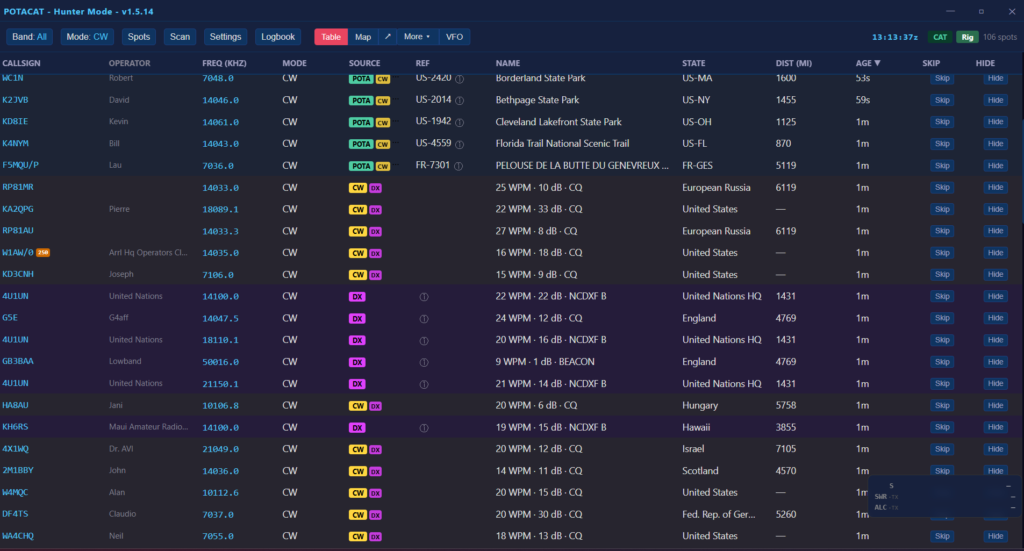
I’m not the greatest POTA hunter, I barely could call myself one at all – but I really like is the short scripts usually used so I can listen in and practice my CW copy. I recently discovered POTACAT and it’s extra helpful in giving the call sign (my weakpoint), op name and QTH. That’s like half the QSO! So, I click on one I find, listen for the signal and work on my operator skills tuning in and my cw skills listening to copy.
But what about when I’m away from desk? I have the original 7300 I got from a club member and it doesn’t have the fancy internet connection, it connects directly to PC. So how do I get POTACAT to *also* cat control that remote computer so it can change the frequency and still use wfweb to fine tune? Now, keep in mind POTACAT does have ECHOCAT and its meant exactly for this purpose but ECHOCHAT is a bit early in development and not as robust as wfweb.
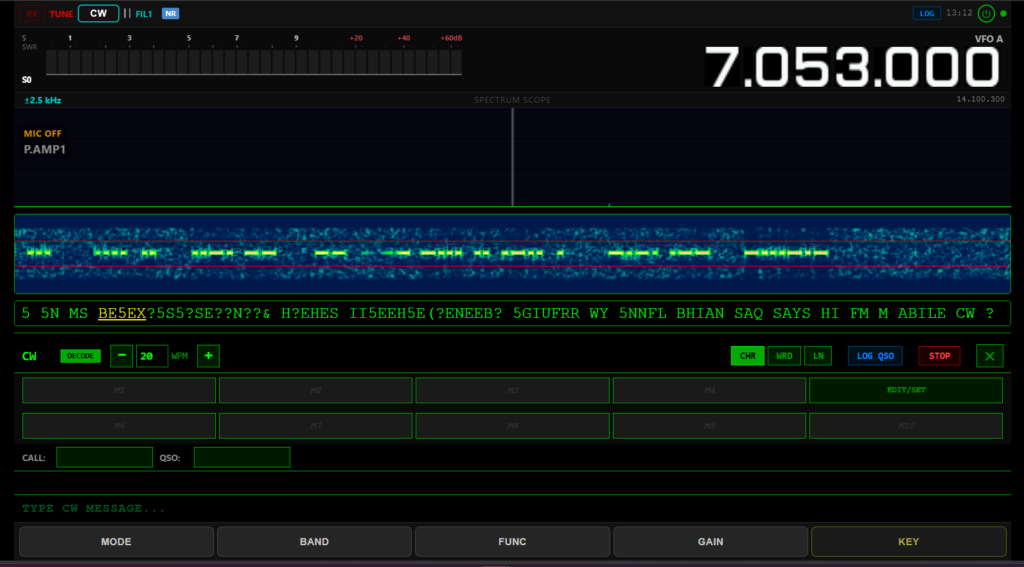
And I love me a waterfall.
The original wfview had something to help with this called rigctld and after a request in Github, the generous @adecarolis did a quick update to wfweb and pow! We have lift off!
Here’s some Claude assisted instruction along with my photos:
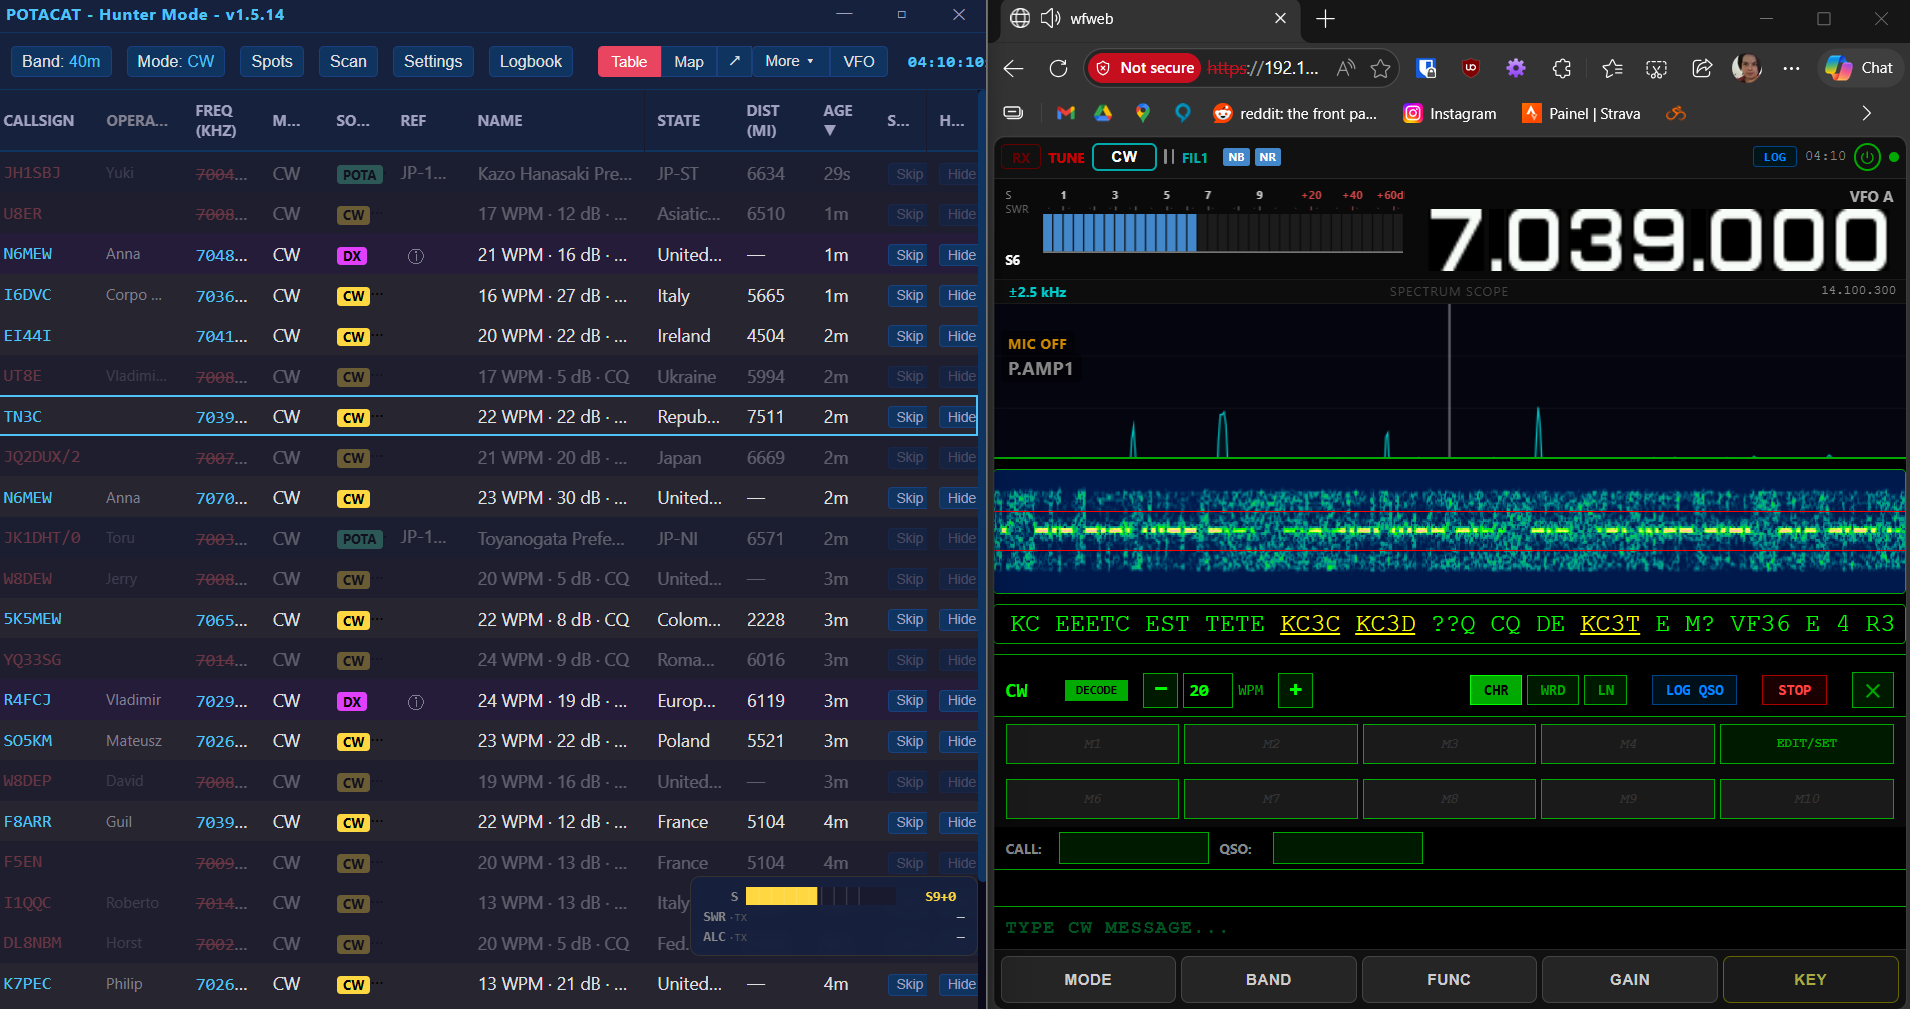
Browser-Based IC-7300 Remote Control with POTA Spot Tuning
This guide documents how to set up a fully remote-capable IC-7300 station accessible from any browser on your local network, with one-click POTA/SOTA spot tuning via POTACAT.
What You’ll End Up With
- wfweb owns the USB connection to the radio, serves the mobile-responsive browser interface (waterfall, audio, FT8, CW decoder), and exposes a built-in rigctld server for CAT control
- POTACAT connects to wfweb’s rigctld over the network and tunes the radio with one click on any POTA/SOTA/DX spot
Step 1: Download wfweb
Grab the latest Windows build from the wfweb releases page (you need the Server build — the Standalone build is browser-only and can’t open TCP listeners). Extract the zip somewhere convenient, e.g. C:\Users\yourname\wfweb.
IC-7300 menu settings to verify:
Menu → Set → Connectors → CI-V → CI-V Baud Rate: 19200 (or Auto)
CI-V Address: 94h (default)
Step 2: Plug In the Radio and Launch wfweb
Connect the IC-7300 to the PC via USB. Open a Command Prompt, change directory to the wfweb folder, and run:
cd C:\path\to\wfweb
wfweb.exe --rigctld-port 4532 --rigctld-bind-all
What this does:
- Starts a rigctld server on port 4532, bound to 0.0.0.0 so other devices on your LAN can reach it
- Starts the web UI on port 8080
Security note: Hamlib’s rigctld protocol has no authentication. Anything on your LAN that can reach port 4532 can key your transmitter. Only do this on a trusted network, or add a Windows Firewall rule restricting inbound 4532 to your laptop’s IP. Drop –rigctld-bind-all if you only need local access (it’ll bind to 127.0.0.1 only).
Step 3: Access the Browser Interface
Find the PC’s IP with ipconfig (e.g. 192.168.0.115). From any device on your LAN, open a Chromium-based browser and go to:
https://<your-pc-ip>:8080
Accept the self-signed certificate warning on first visit.

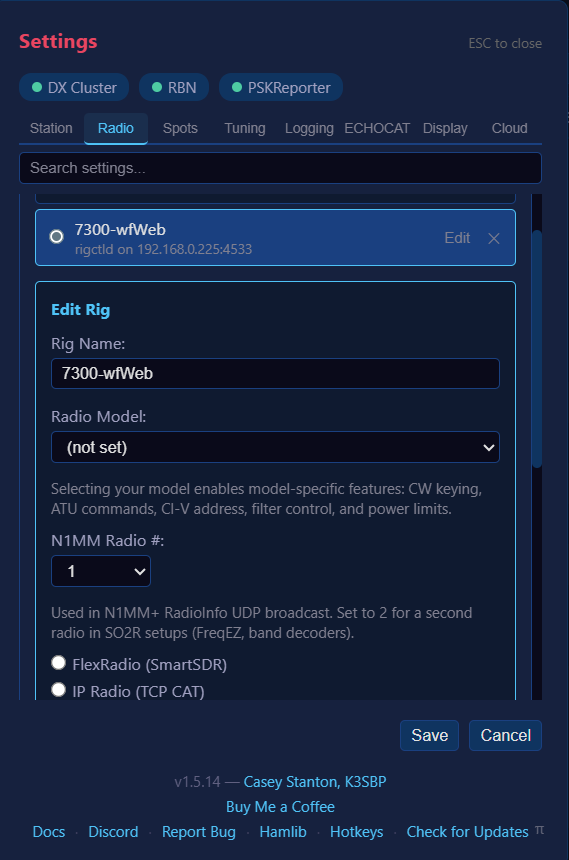
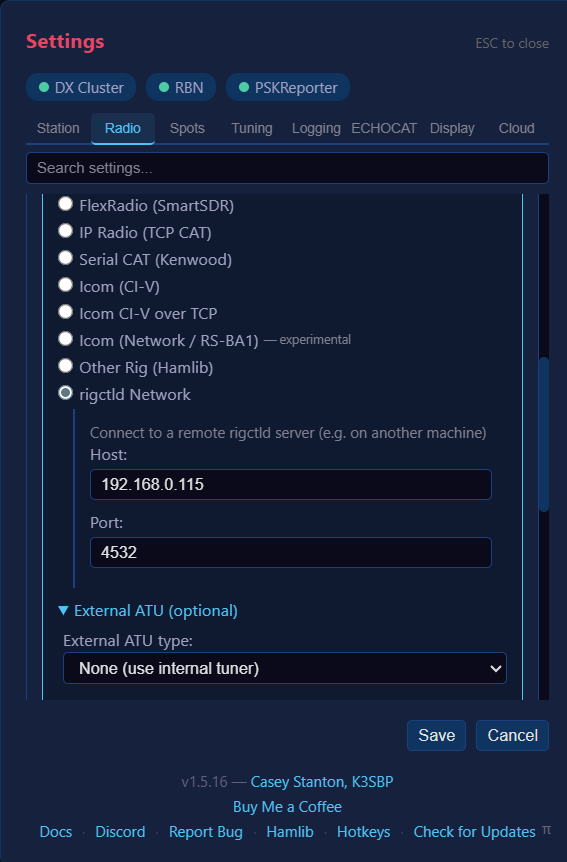
Step 4: Connect POTACAT
Install POTACAT and configure it to talk to wfweb:
- Open POTACAT and go to Settings → Rig
- Set connection type to Rigctld (Network)
- Host: your radio PC’s IP (e.g. 192.168.0.115)
- Port: 4532
- Rig model: IC-7300
- Click Test Connection — it should confirm successfully
Now clicking any POTA, SOTA, or DX spot in POTACAT will instantly tune your IC-7300.